Cisco ACI Simulator on VMWare Workstation 15 for Windows 10
Introduction
If you follow me on Instagram, Facebook or Twitter, you will have noticed that I have been studying and practicing for the Cisco DevNet certifications. With this post of My Journey to Cisco DevNet Associate my story begins. In short, during this study process I have known programmability and automation platforms such as Cisco ACI.
Cisco ACI has an emulator that we can install on our PC. This emulator is a Virtual Appliance that emulates a complete ACI environment, from the APIC controller to the Leaf and Spine switches. This allows us to test the ACI functionalities and practice with the APIs without requiring physical hardware.
So let’s see in this tutorial, How to Download and Install Cisco ACI Simulator 4.2 on VMWare Workstation 15 for Windows 10?
Also, if you wish, you can see the process in this video that I uploaded to YouTube:
Step #1 – Download the .OVA images of Cisco ACI Simulator 4.2
Link to the official page of the simulator: Cisco ACI Simulator.

By clicking on Download ACI Simulator we enter the official Cisco software download page. The emulator is in OVA format. Since this is deployed within a preconfigured virtual machine, which we are going to load in VMWare Workstation. In my case I used version 4.2(6d), but it is very likely that there are more updated versions today.
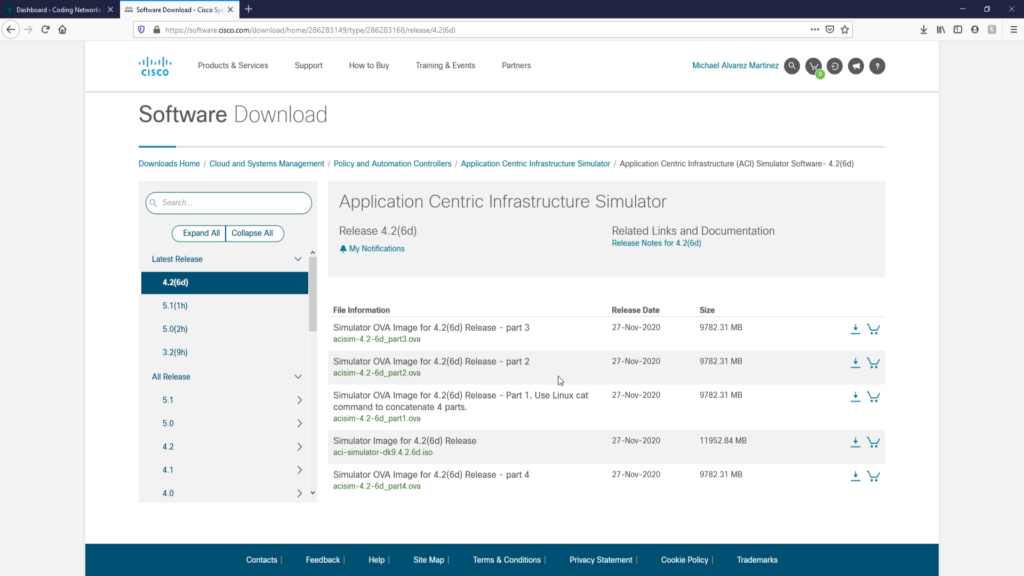
If the version you are downloading has multiple parts, download them all.
Step #2 – Concatenate the .OVA images with the ‘cat’ command on Linux
Once you have downloaded all the parts, you can concatenate them all with the command:
cat acisim-4.2-6d_part* > acisim-4.2-6d.ova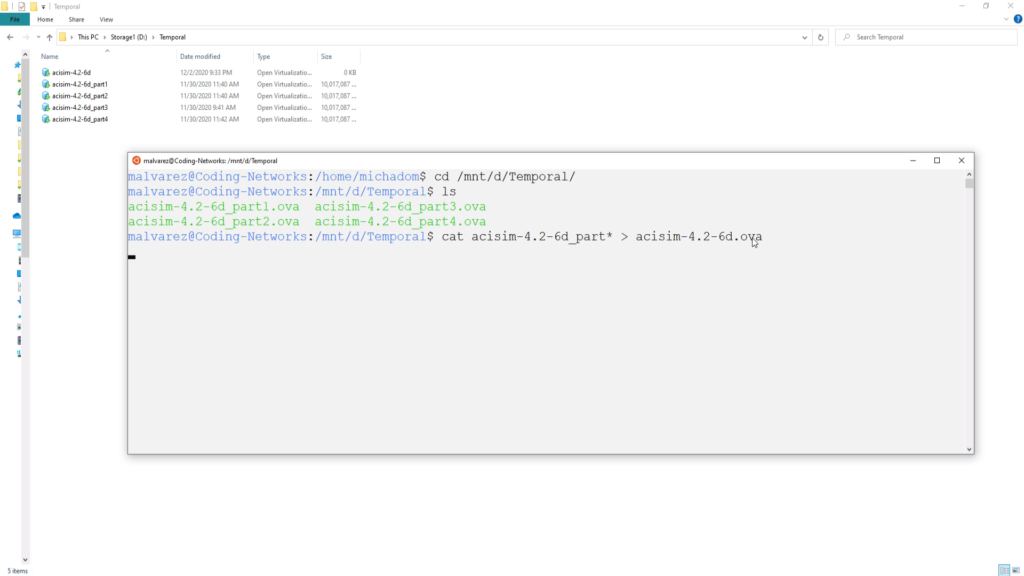
Step #3 – Import into VMWare Workstation 15 the concatenated .OVA image
Once you have completed the concatenation of the OVA, we simply double click and the virtual machine of the Cisco ACI Simulator will begin to be imported into VM Workstation as seen in the following image. This import process can take a while depending on the computing resources of your computer. It took me about 20 minutes.

Once this process is complete, we are going to change the type of network connection that the virtual machine brings to Host-Only. Which configures a private network between this virtual machine and my physical computer. In the image I choose the Custom option and VMnet1, because I have this interface configured as Host-Only for a subnet that I share with other virtual machines.
Repeat the same with the second network interface.

Step #4 – Start the VM and Perform Basic Configurations
Let’s start the virtual machine to start the ACI boot process. Since this is the first time starting, an interactive setup process will start. The first configuration that we will find is to choose the type of topology. There are two types of topologies:
- Large Topology: 3 APICS, 2 Leaves Switches and 2 Spines Switches. At least 64GB of RAM and 16+ CPUs are recommended for the Large topology.
- Small Topology: 1 APIC, 1 Leaf Switchy 1 Spine Switch.
If you do not have the recommended resources for a Large topology, choose N, so that it does not load Large, but Small.

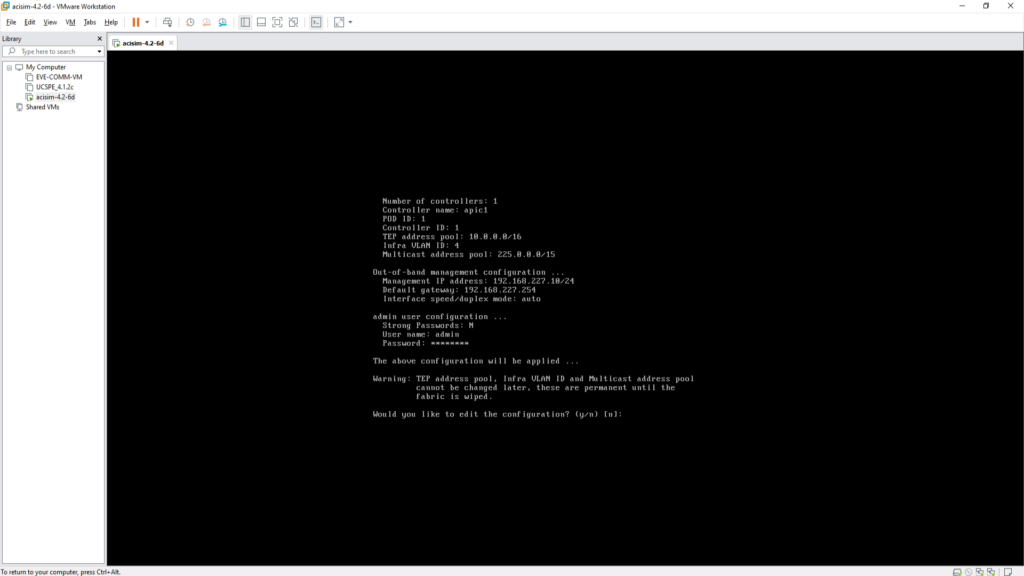
From now on, there will be a series of configurations that we will leave the options that come by default in all except when it asks for the controller management IP and the Default Gateway.
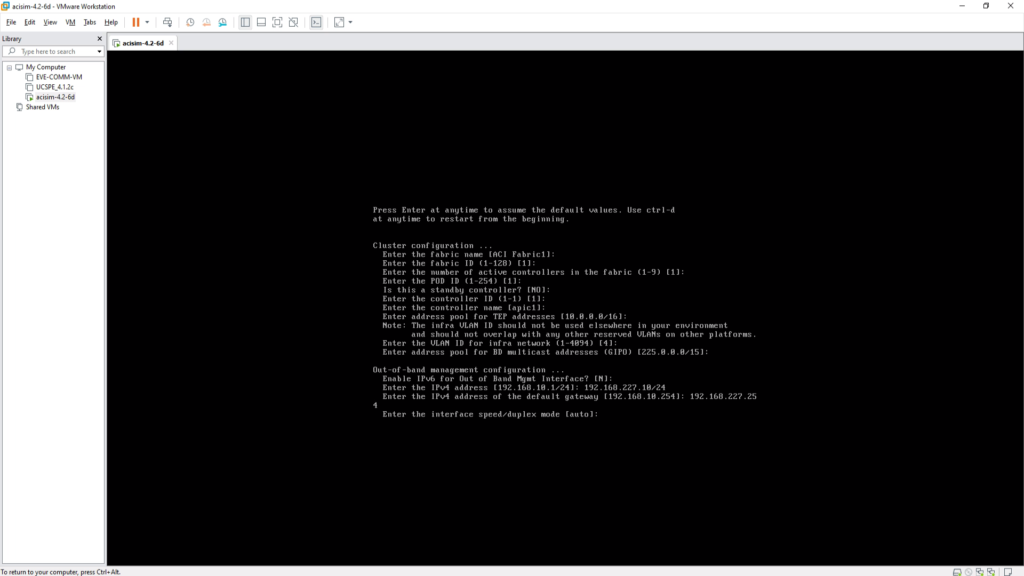
There will come a time when it asks if you want to set up a Strong Password. I indicated No, because I use this simulator for laboratories.

Finalmente nos pregunta si queremos editar la configuración. Elige No y aqui termina el proceso de booteo del Cisco ACI Simulator.
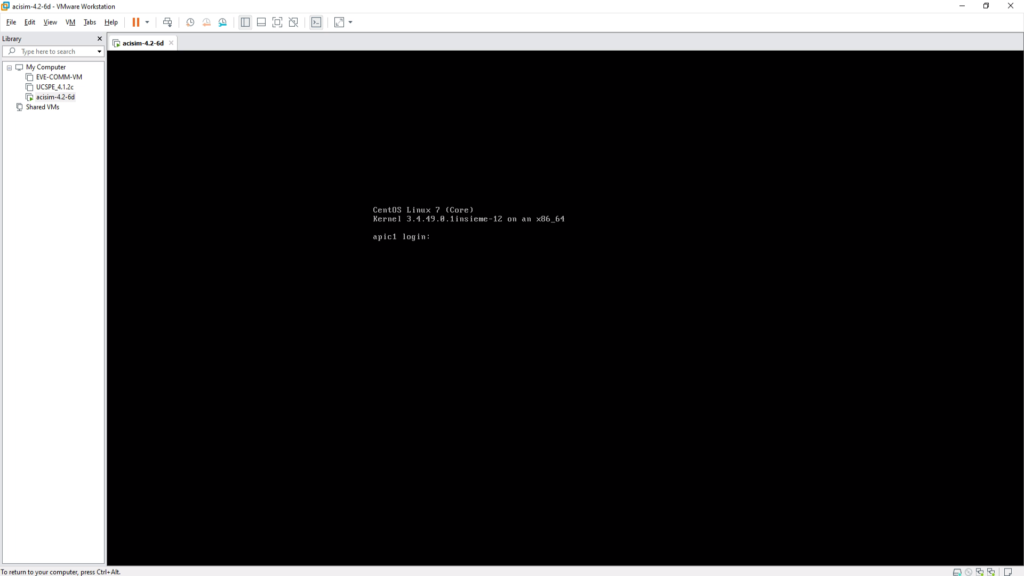
The signal for you to know that the system is already up is when the login in the following image appears:
Step #5 – Access the Web GUI
We proceed to open a browser, place https://, to access the APIC Controller. The credentials to use are the ones we typed during the interactive configuration process. See details in the YouTube video at the beginning of this post.

Step #6 – Register Leaf and Spine Switches
Let’s add or register some switches. For this we go to the menu Fabric -> Fabric Membership -> Nodes Pending Registration. They right click on the node that appears in the list and click on register. It will ask you to enter a Name and Node ID. The rest can be left by default.
About 3 minutes later, another node will come out, which they must register in the same way.
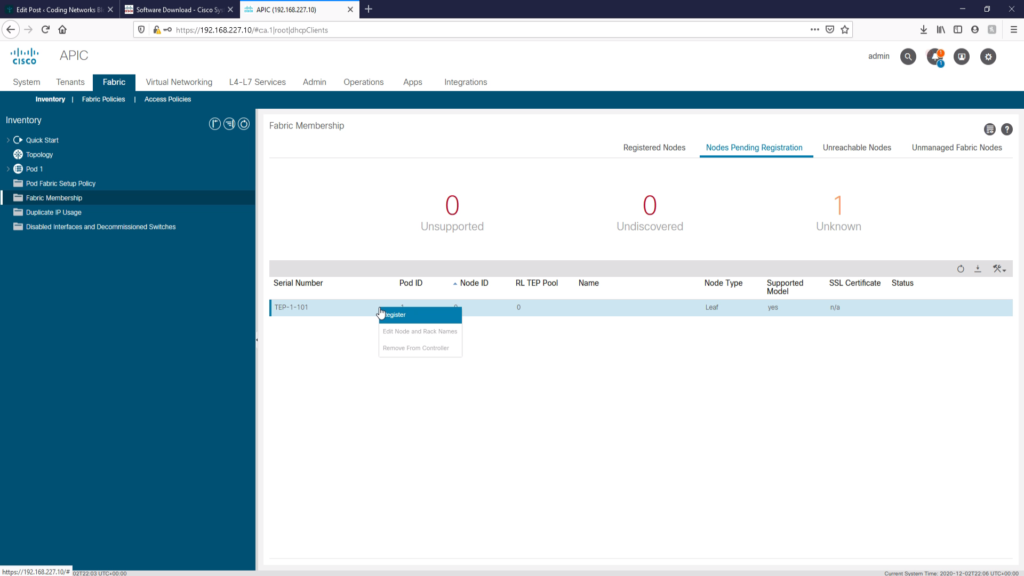
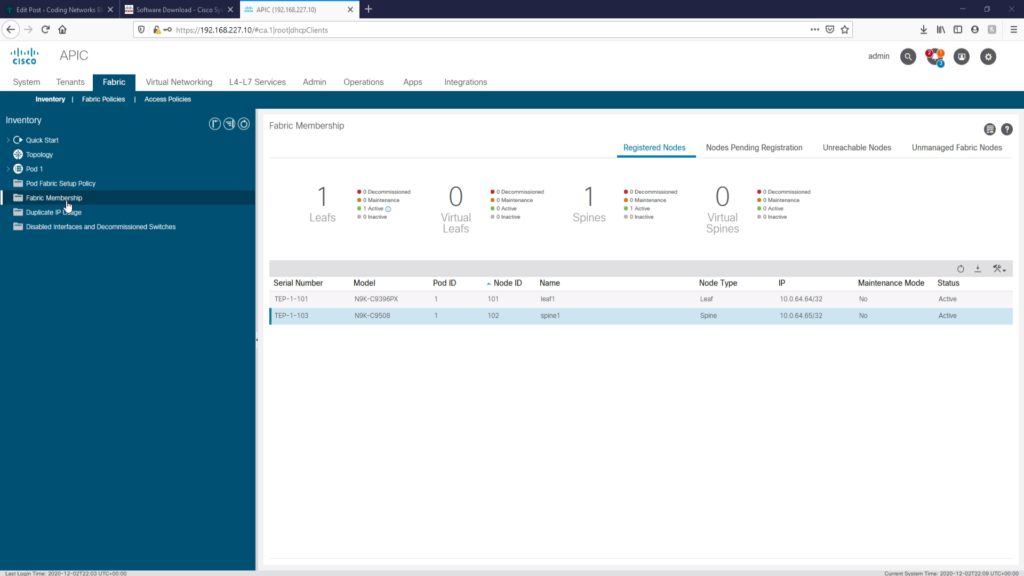
If you go back to the Registered Nodes tab, you’ll see the two Leaf and Spine switches that we just registered. Wait a few more minutes until the Status of both nodes changes to Active.
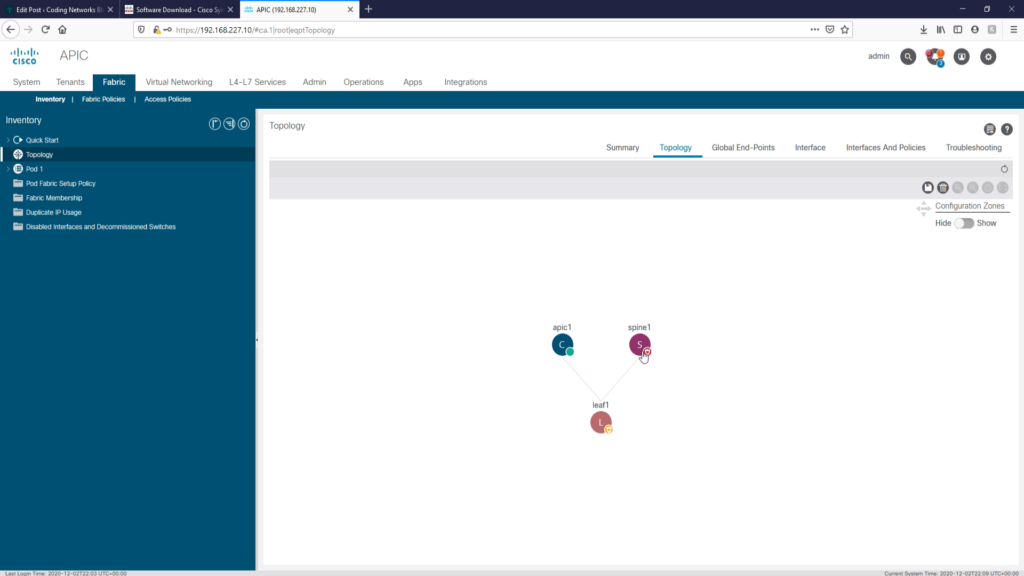
If we go to the Topology view in the left menu, you can see the topology ready.
Everything is ready to start configuring and practicing our exercises in the Cisco ACI Simulator.
Conclusion
As you saw, this process is simple. It is worth installing this emulator, because you can learn everything you need about Cisco ACI for DevNet exams. The most important thing is that you can make calls to the APIs and practice programmability and automation.

By
Related Posts
Learning Docker from Zero. My Cheatsheet explained.
Learning Git from Zero. My Cheatsheet explained.
How to Deploy Cisco UCS Platform Emulator on VMWare Workstation 15 for Windows 10?